
Learn How to Create a Network Diagram in Less Than 5 Minutes!
Network Diagrams contain the same tools, and are built the same way as Flowchart Diagrams. Watch this short video tutorial about Flowchart Diagrams to learn how to create a Network Diagram in SmartDraw.
The Basics
Select Network Diagram from the Network Design category.
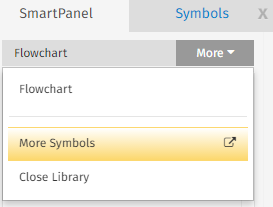
Add symbols to your diagram by dragging and dropping (or clicking and stamping) from the current library in the SmartPanel or Symbols tabs. To find additional symbols, choose More Symbols from the More drop down menu, then browse or search by keyword to find your desired symbol.
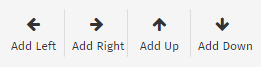
Add your next symbols to the diagram by using the Add Left, Add Right, Add Up and Add Down arrows.
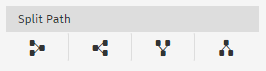
Add a split path by selecting the symbol from your Work Area, then choosing one of the Split Path options from the Split Path section of the SmartPanel.
Add text to a split path line by double-clicking on the line, which engages the text tool. When finished typing, click elsewhere in your Work Area to save typed text.
Join a split path by selecting one symbol from a split path, then clicking Join Paths in the Split Path section of the SmartPanel.
![]()
Create a back-loop to a previous shape in your Diagram by selecting Line from the Home tab, which engages the line tool. Click on the perimeter of the latter symbol in your Diagram to set the initial connection point, then click on the perimeter of the earlier symbol to set the final connection point.
Add text to symbols by clicking on the symbol in the Work Area and typing with yourkeyboard. If you determine that a shape is unwanted, simply remove it by clicking on the symbol in your Work Area and choosing Delete from your keyboard. Similarly, if you need to move a shape from one position to another, do this by dragging and dropping.
Add a free-floating text box to your visual by selecting Text from the Home tab, then clicking into the Work Area to type. Click elsewhere in your Work Area to saved typed text.

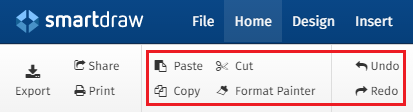
Perform various actions such as Paste, Copy, Cut, Format Painter, Undo and Redo from the Clipboard section of the Home tab.
Formatting
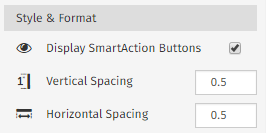
Use the options in the Style & Format section of the SmartPanel to Display SmartAction Buttons or change Vertical and Horizontal Spacing of the entire visual.
If you need to adjust the vertical or horizontal spacing between two symbols on a Network Diagram, select the line when you see the cursor with a white plus sign.
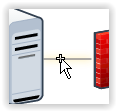
Drag the small green circle that appears on the line vertically or horizontally until desired spacing is reached.

Add color and style to shapes by selecting from the options in the Styles section of the Home tab.
Format the text in shapes by selecting from the options in the Font and Paragraph sections of the Home tab.

Change the properties of a symbol by selecting the symbol from your Work Area, then choosing Dimensions, Connection Points, Text Entry, or Grow Properties from the Design tab.

Comments
0 comments
Article is closed for comments.