Getting Started with Gantt Charts
Watch this short video tutorial to learn how to create a Gantt Chart in SmartDraw.
The Basics
Select the basic Gantt Chart template from the Gantt Charts category.
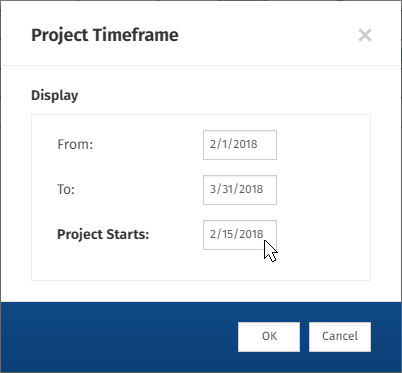
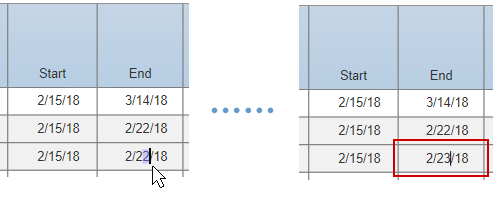
Set your project timeframe by clicking Timeframe from the Project section of the SmartPanel, or type the start and end dates into the Start and End columns within the Gantt Chart.
Add Tasks
Add a task by selecting Add Task from the Tasks & Milestones section of the SmartPanel. Remove a task by selecting the task in your Gantt Chart, then choosing Remove Task.
Name your task by typing into the Task column.
To adjust due dates for a task, simply type in a start or end date on your chart and a bar representing the task will be automatically added to the chart. You can also adjust the duration of a task using the bar itself, just grab an end with the mouse and drag.
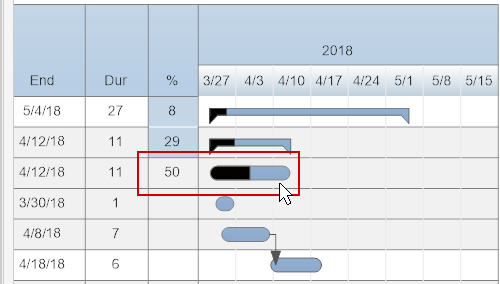
Easily track the progress of your project by entering the percent complete for each task. Percent complete is shown visually on each task bar.
Add a milestone by clicking Add Milestone from the Tasks & Milestones section of the SmartPanel.
Group Tasks
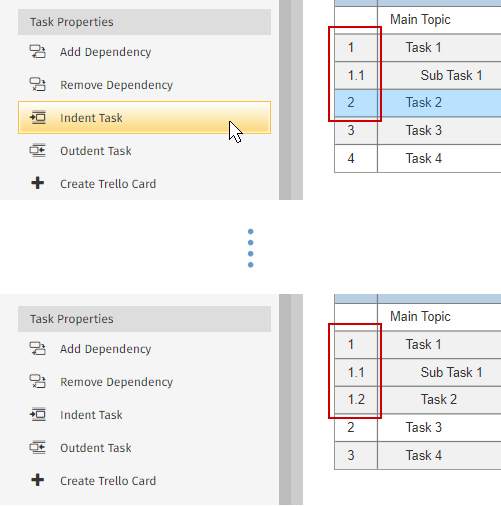
Change a task to a sub-task by selecting the task in your Gantt Chart, then choosing Indent Task from the Task Properties section of the SmartPanel.
Alternately, change a sub-task back to a task by selecting the sub-task then choosing Outdent Task.
Sort your tasks by clicking Sort by Due Date or Auto Schedule from the Tasks & Milestones section of the SmartPanel.
Add Dependencies
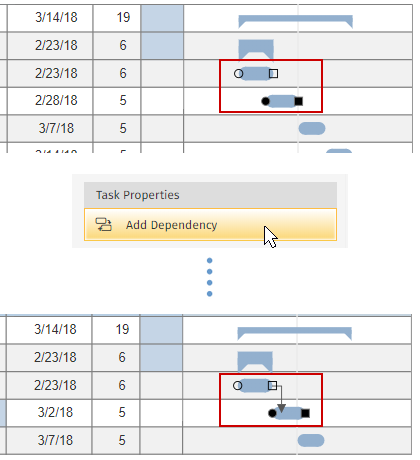
If you have a task that can't begin until another is completed, you'll want to add a dependency. To do this, hold down CTRL and select the bar representing the task that you need completed and the bar representing the task that depends on this completion and hit Add Dependency in the SmartPanel.
You can see that it automatically resets the starting point of the dependent task and adds a line connecting them. Continue on with your estimates and due dates, adding dependencies where necessary.
To remove a dependency, select the dependent task's bar, then click Remove Dependency.
Change What is Visible on Your Project Chart
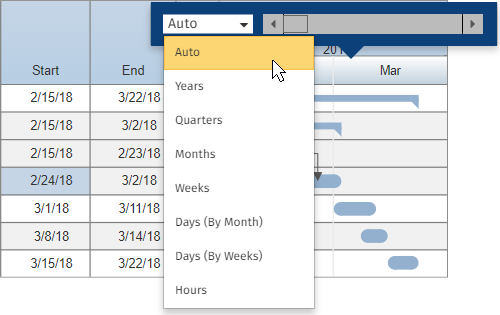
Change the scope of your project by selecting from the drop down menu in the floating toolbar within the calendar column of your Gantt Chart. Select from Auto, Years, Quarters, Months, Weeks, Days (by Month), Days (by Weeks), or Hours.
Define your Project options by selecting Project Options from the Project section of the SmartPanel. Choose your desired project properties from the Project Properties dialog window. Here you can define your work week and non-working holidays. You can also show or hide specific details about the tasks on your chart. This will allow you to control the level of detail and complexity you want to show.
View Your Gantt Chart as a Mind Map
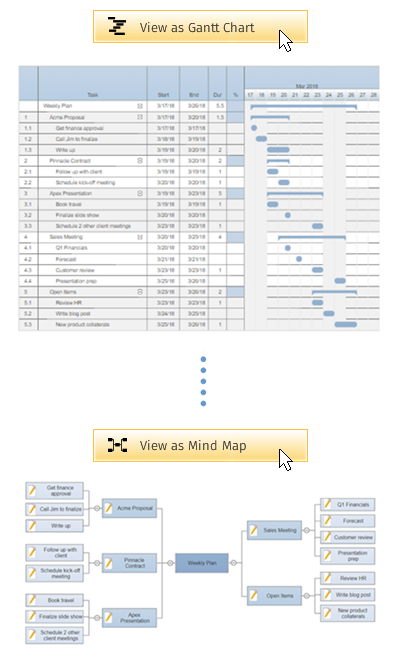
The best way to see your project at a glance and see how all the tasks are related is to view your project as a mind map. SmartDraw easily lets you switch to a Mind Map view of your project if you click on the View as Mind Map button in the SmartPanel.
Once in the mind map view, you'll see each of your tasks represented as a box on a mind map. You can make edits to your project in this view. Select one of your tasks and hit Add Right in the SmartPanel or use [CTRL] and the right arrow key to do the same. If you have one of the new subtasks selected, you can keep hitting [ENTER] to add more subtasks under the same task.
You can either use the SmartPanel buttons or simply the arrow keys to build out your entire project plan.
Use the arrow keys to navigate between tasks and use [CTRL] and the arrow keys to add more subtasks where you want to.
When you're done, switch back to the project chart view using the tab at the bottom of your work area or the View as Gantt Chart button on the SmartPanel. You can now see all of your tasks and subtasks neatly indexed into a hierarchy making it easy to start filling out estimated durations and assign responsibilities.
Connect Your Project Chart to Trello
Connecting your project chart to Trello allows you to create full accountability. You can turn any task into a Trello card and assign team members.
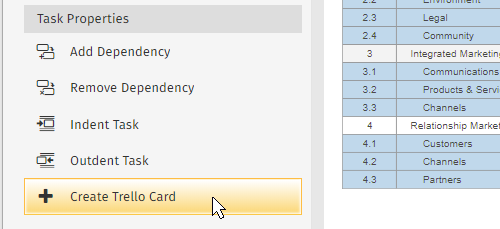
Select any task and click the Create Trello Card button. You'll be asked to login to Trello, choose any of your existing boards, select the lane the task belongs on, and assign a team member.
Changes to the Trello cards are reflected in your project chart the next time you open it. So when a team member marks a Trello card as complete, the project manager will see this in the SmartDraw project chart. Likewise, changes to the project chart, like task due dates, are reflected in the Trello card in real time.



Comments
0 comments
Article is closed for comments.