
Getting Started with Mind Maps in Under 5 Minutes
Watch this short video tutorial to learn how to create a Mind Map in SmartDraw.
The Basics
Select the blank Mind Map template from the Popular category, or choose a Mind Map template from the Mind Maps category.

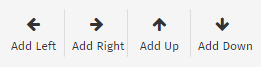
Type your main idea into the "Name" shape in your Work Area, and add shapes to your Mind Map by using the Add Left, Add Right, Add Up, and Add Down arrows in the Build section of the SmartPanel.
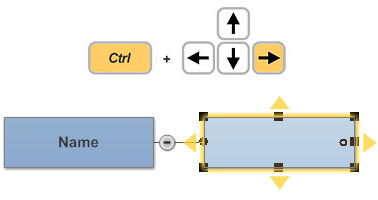
Alternatively, you can add shapes by selecting the yellow action buttons at the side of the shape, which appear while hovering your mouse over the shape.
You can also use the keyboard to add shapes. Hold down the [CTRL] key and hit the left arrow key to add a shape to the left or hold down the [CTRL] key and hit the up or down arrow key to add a shape above or below the one you have selected. In fact, you can add all the shapes to your mind map without taking your hands off the keyboard.
Add Text
You can add text by selecting a shape and simply typing.
Just like filling in a form, you can use the tab or arrow key on the keyboard to navigate from shape to shape and enter text.
You can navigate from shape to shape using the [TAB] or [ARROW] keys.
Rearrange Shapes
To remove a shape select it and hit the delete key - just like you'd remove text in a word processor. Removing the shape makes your mind map reflow - just like deleting in a word processor causes your text to reflow.
You can also insert a new topic and the mind map will automatically reformat to accommodate the new shape.
Use the mouse to move shapes around and SmartDraw will adjust your mind map automatically. To move a shape, select it and without letting go of the mouse move it to any location you desire. As you move your shape, you'll notice SmartDraw's automatic connectors will attempt to grab it. SmartDraw shows you a dashed outline of where your shape will be if you let go of your mouse. To drop a shape into place, simply let go of your mouse.
You don't need to line shapes up or connect them manually.

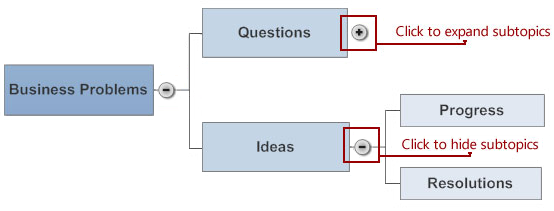
Collapse and Expand Sections
Collapse and expand shapes and branches by selecting the Collapse or Expand Node on the branch of the Mind Map.
Formatting
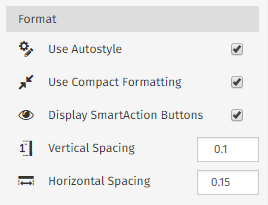
Use the options in the Format section of the SmartPanel to change formatting and spacing options.
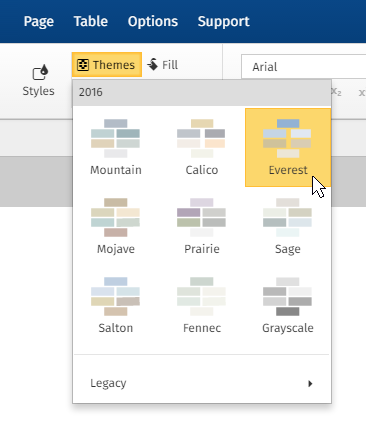
SmartDraw automatically applies professional design themes for you, but also gives you complete control to customize your mind map in any way you want.
Change the entire look of your mind map by applying a new design theme with just one click.
Or change the look of individual shapes instantly by selecting a new Quick Style. Choose from more than 40 preset looks.
Format the text in shapes by selecting from the options in the Font and Paragraph sections of the Home tab.

Add Hyperlinks and Change Icons
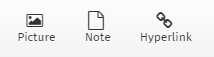
Add a Hyperlink to a shape by clicking on the shape from your Work Area, then selecting Add Hyperlink from the Edit section of the SmartPanel. Use the Hyperlink dialog box to browse your SmartDraw Account, or other integrated services, for your file. You can also simply copy-paste a URL of your choice.
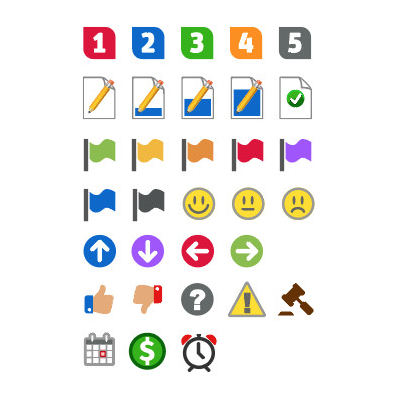
Change the icon in a shape by clicking on the shape from your Work Area, then selecting Change Icon from the Edit section of the SmartPanel.
Flag items for review or rate them with emojis. SmartDraw also has automated icons for task progress updates if you want to use your mind map to manage a project.
Add a note to a shape by selecting the shape from your Work Area, then choosing Note from the Insert tab.
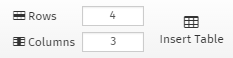
Add a table to a shape by selecting the shape from your Work Area, adjusting the Rows and Columns fields, then clicking Insert Table from the Table tab. If you would rather add a table outside of your Mind Map, do so by adjusting the Rows and Columns fields, then clicking Insert Table from the Table tab.
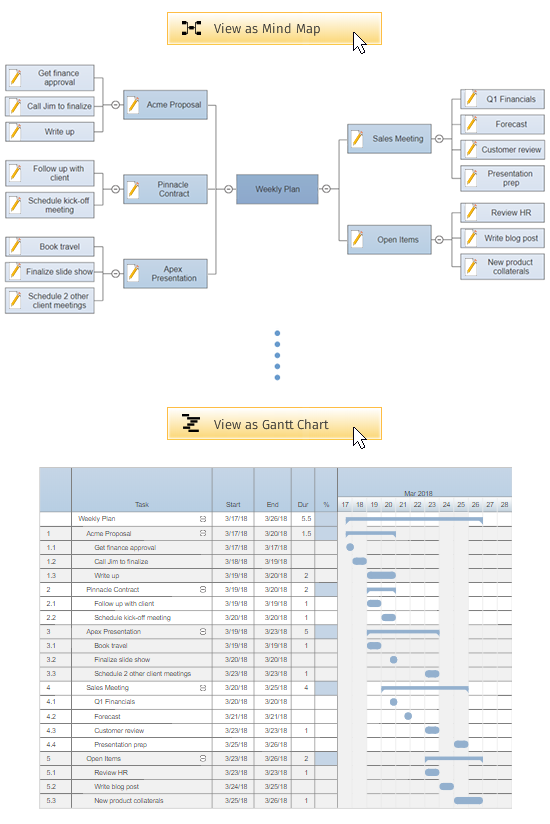
Convert Your Mind Map into a Project Chart
You can use a mind map to brainstorm tasks for a project and when you're ready to convert it into a project chart, SmartDraw makes it easy.
Map out your project by grouping tasks into logical hierarchical groups.
When you're ready, convert it to a project chart, by clicking the View as Gantt Chart button in the SmartPanel.
Once your mind map has been converted to a project chart, you can specify task duration, add dependencies or milestones, and specify a resource responsible for completing each task.
In a few clicks, you can go from a freshly brainstormed mind map to a detailed project chart.
You can manage the entire project in this one document and easily switch back and forth to the different views using the tabs at the bottom of your work area.
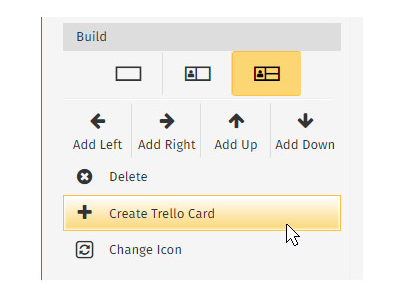
Connect Your Mind Map to Trello
You can easily create a Trello card for any item on a mind map. First select the item you want to convert to a Trello card, then click on the Create Trello Card button in the SmartPanel.
You'll be asked to sign in to Trello, choose any of your existing boards, select the lane the task belongs on, and assign a team member.
Changes to the Trello cards will be reflected on your mind map the next time you open it.
Brainstorm and run meetings using a mind map and make them actionable with Trello.
Comments
0 comments
Article is closed for comments.