Getting Started with Landscape Plans in Under 5 Minutes
Landscape Plans and Floor Plans are built using the same tools in SmartDraw. Watch this short video tutorial on Floor Plans to learn how to get started with your Landscape Plan.
Details: How to Make a Landscape Plan
The Basics
Select a template from the Landscape Design category.
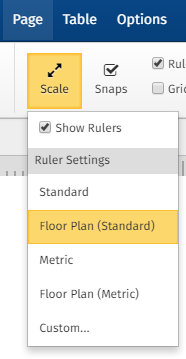
Begin by setting the scale for your layout. Select the scale by clicking Scale from the Page tab.
Add lines to your layout by selecting from the Line drop down menu in the Home tab, then by clicking and dragging your cursor into the Work Area. To engage the line tool for longer than one segment, hold Shift from your keyboard while selecting from the Line drop down menu. When you are finished drawing lines, click Select from the Home tab to disengage the line tool.
Adjust the dimensions of a line by clicking on the dimension line and typing with your keyboard. Press Enter from your keyboard, or click elsewhere in your Work Area to save the typed dimension. Alternately, you can click and drag a line from the black handles located at the end of the line segment to either reduce or enlarge the size.
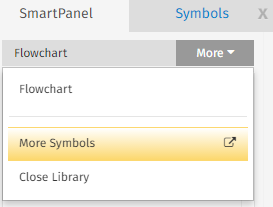
Add symbols to your Landscape Design by dragging and dropping (or clicking and stamping) a symbol from the SmartPanel or Symbols tab onto your Work Area. To locate additional symbols, choose More Symbols from the More drop down menu in the SmartPanel or Symbols tabs, then browse or search the available symbol libraries. Once the symbol is in your Work Area, move it around to the desired location by dragging and dropping.
Add a free-floating text box by selecting Text from the Home tab, then clicking into the Work Area to type. Click elsewhere in your Work Area to saved typed text.
Formatting
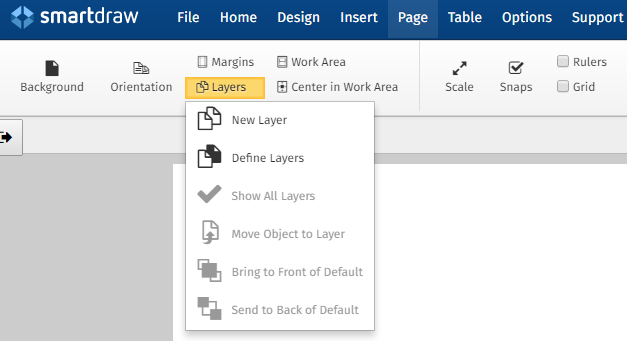
Add layers to your Landscape Design by clicking Layers from the Page tab.
Add an image by selecting Picture from the Insert tab.
Add color and style to your Floor Plan by selecting from the options in the Styles section of the Home tab.
Format the text on your Floor Plan by selecting from the options in the Font and Paragraph sections of the Home tab.
Perform various actions such as Paste, Copy, Cut, Format Painter, Undo and Redo from the Clipboard section of the Home tab.
Align or group objects by selecting two or more objects from your Work Area, then clicking Align or Group from the Design tab.
Rotate or flip an object by selecting the object, then clicking Rotate or Flip from the Design tab.
You can also rotate a symbol directly from the Work Area by selecting the symbol, then clicking and holding the Rotation Handle while moving your cursor to the desired degree of rotation.
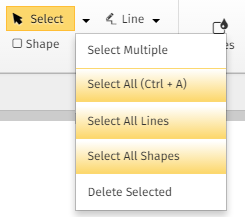
Select multiple items in your Landscape Plan by either choosing an option from the Select drop down menu in the Home tab or, by holding Shift from your keyboard while simultaneously clicking on the shapes to be selected.
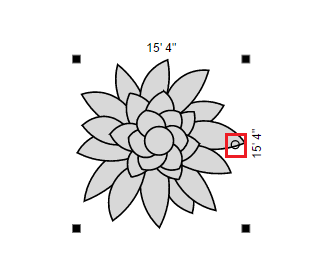
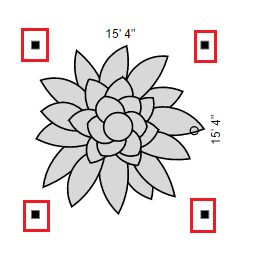
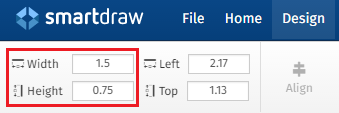
Change the size of a symbol by selecting the symbol in your Work Area then clicking and dragging one of the black square handles to reduce or enlarge it as desired. Alternately, try selecting the symbol then typing desired dimensions into the Width and Height fields in the Design tab.
Change the layout, make symbols the same size, or space symbols evenly by selecting the symbols from your Work Area, then clicking Bring to Front or Send to Back, Make Same, or Space Evenly from the Design tab.
Change the properties of a symbol by selecting the symbol from your Work Area, then choosing Dimensions, Connection Points, Text Entry, or Grow Properties from the Design tab.







Comments
0 comments
Article is closed for comments.