Creating a beautifully formatted multi-page file in SmartDraw and SmartDraw for Windows is simple. Any changes or additions to formatting (shape or font color, texture, effects etc.) will be maintained from page to page.
Let's create a new Flowchart in SmartDraw, add a second page to the document, with a different theme, and see the changes remain when switching back and forth from page 1 to page 2:
First, select any template from the Flowchart category on the home page of cloud.smartdraw.com. For this example, I'll choose the Shipping Process template.
For simplicity sake, I'll leave the current theme of the Shipping Process template, but I will add an additional page to this file, and change the theme.
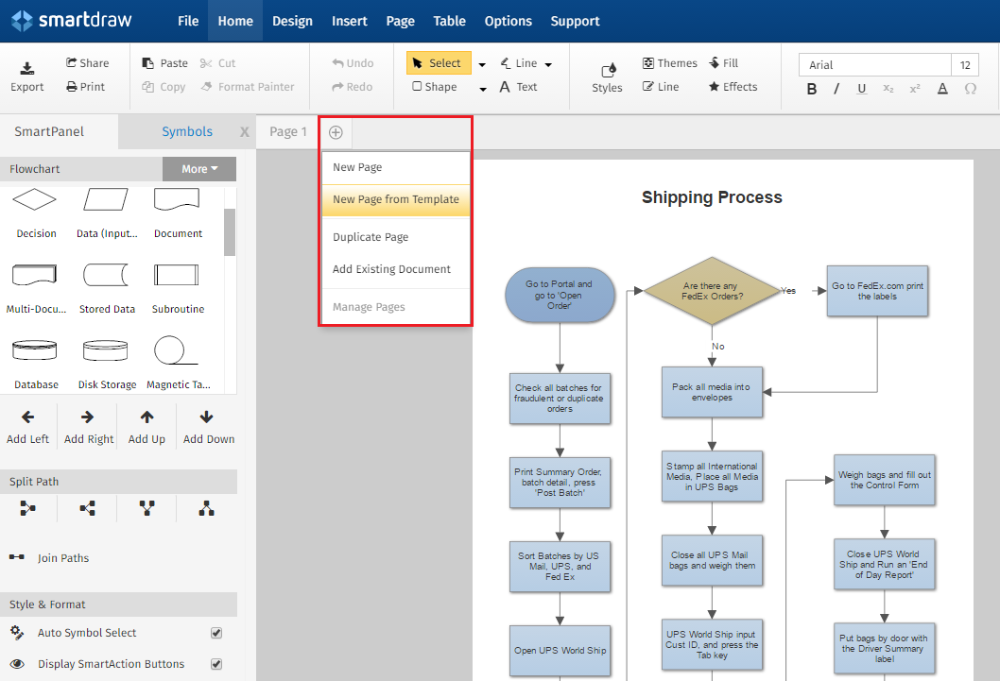
To add a page, select the small plus symbol at the top of your Work Area, then choose the type of page you will be inserting from the drop down menu. In this example, I'll choose New Page from Template.
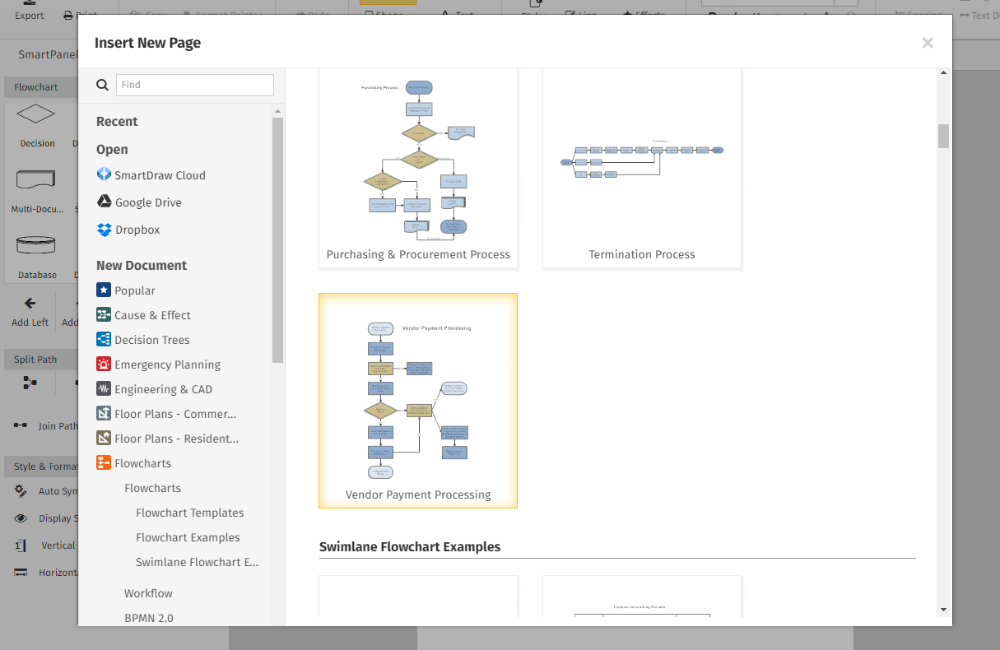
Select your desired template from the Insert New Page dialog window that appears in the forefront of your screen.
In this example, I'll choose Vendor Payment Processing.
You will now be redirected to your file, to the newly inserted page. At this point, make any changes to the file that you would like, such as different coloring, renaming of the pages, new font types, etc. I'll make the following changes to my file:
1. Renaming both pages to reflect what each page in the file represents.
2. Recoloring the second (2nd) page to be a different theme than the first (1st) page.
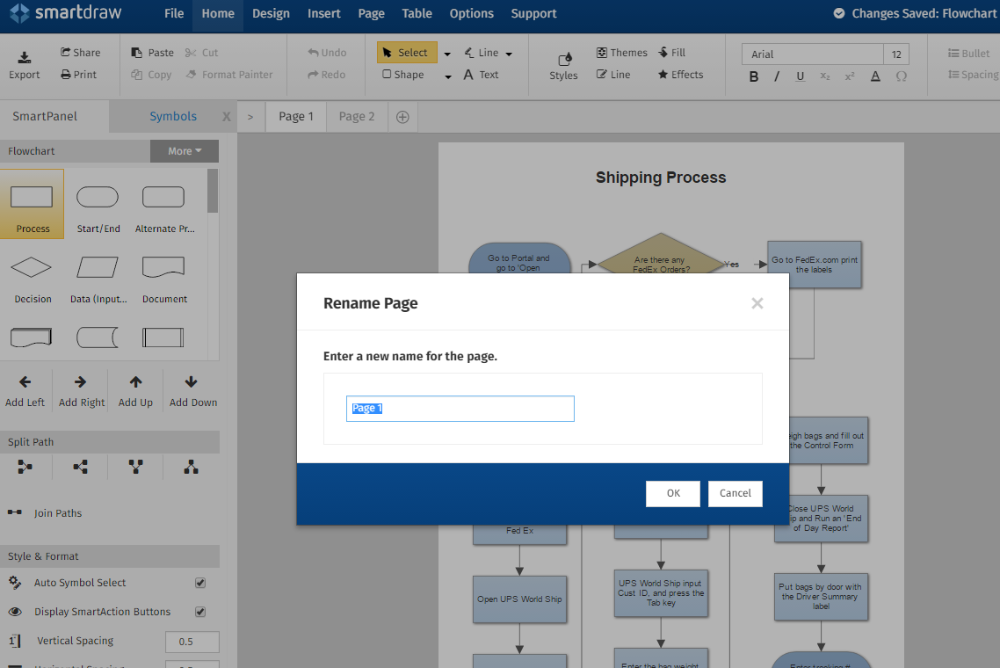
To rename the pages, simply double click on the tab that is located at the top of your Work Area.
Type the new name for your page into the field within the Rename Page dialog window. Click OK.
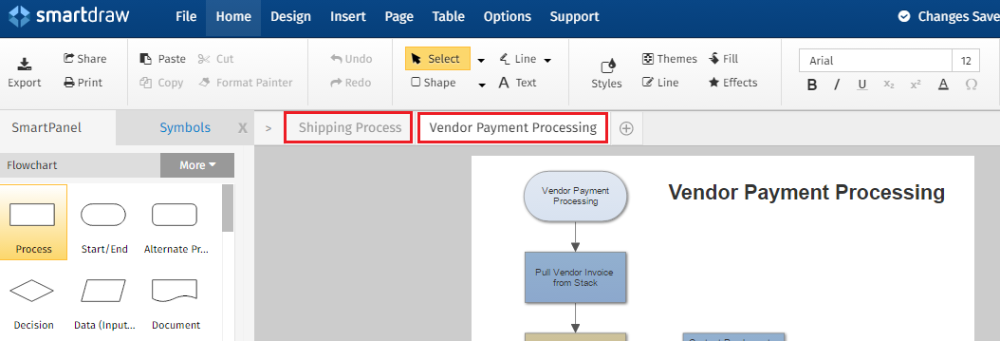
The newly renamed pages appear immediately after clicking OK:
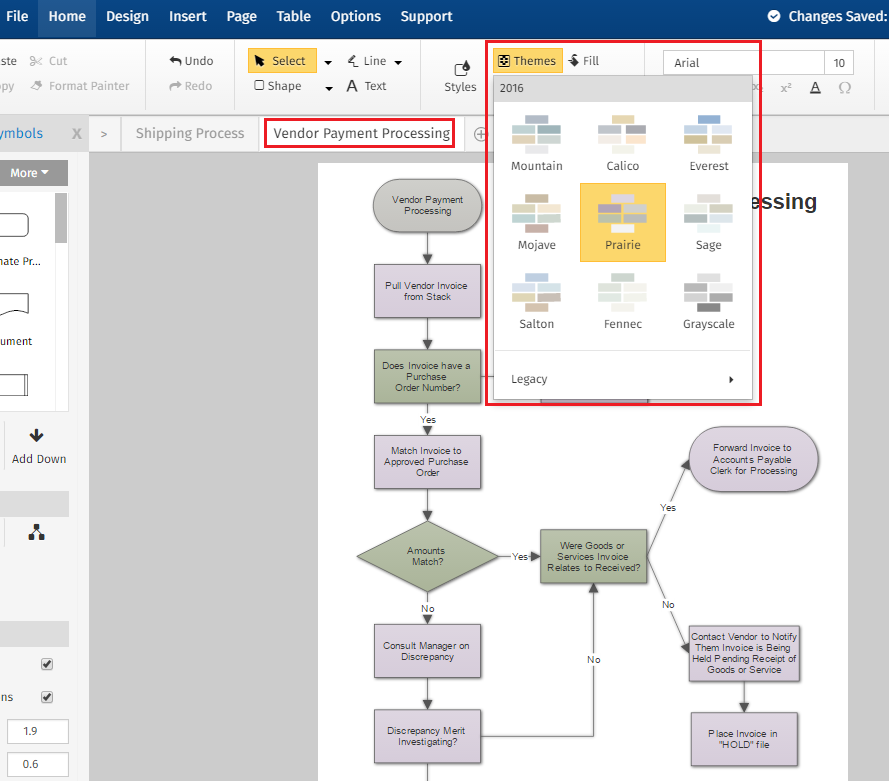
To recolor the theme on page two (Vendor Payment Processing), first select the Vendor Payment Processing tab, then choose your desired theme from the Themes menu on the Home tab.
Notice that the theme changes immediately on the Vendor Payment Processing page:
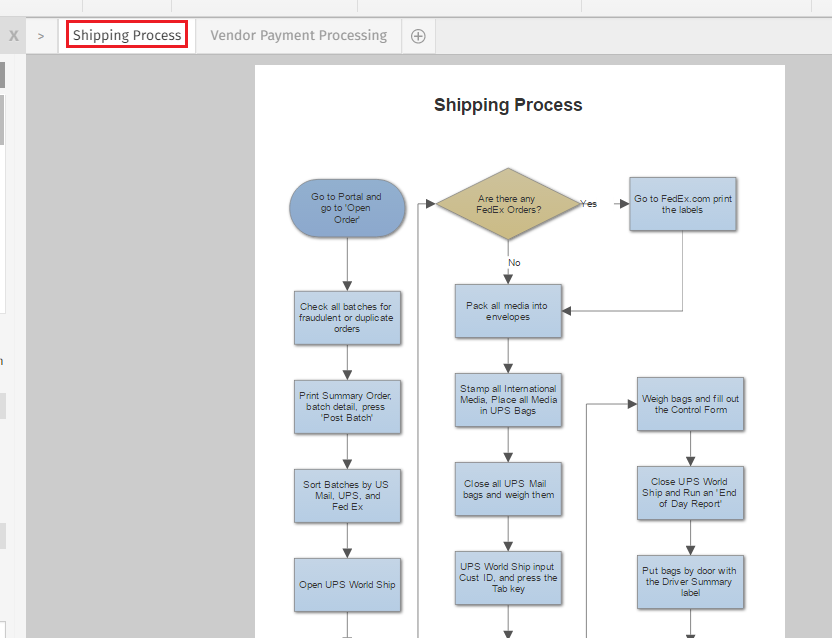
To see the theme changes between pages, click on the Shipping Process tab at the top of your Work Area.
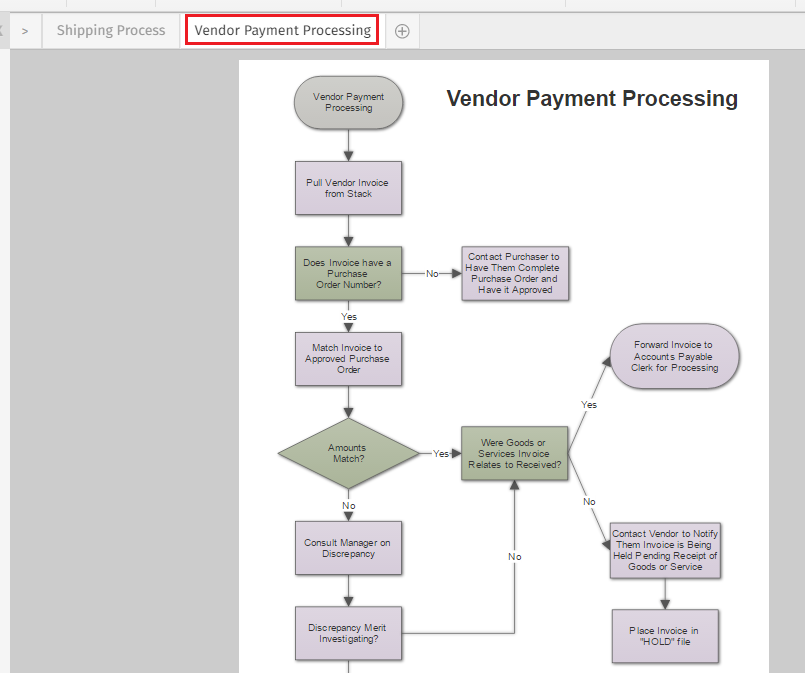
Click back to the Vendor Payment Processing tab to see that the theme you have chosen still remains:
This same process and functionality applies to files made in SmartDraw for Windows; however, you will want to remember to save your changes regularly in SmartDraw for Windows, as they are not auto-saved.
See the related articles for more on saving in SmartDraw for Windows versus the auto-save feature in SmartDraw.

Comments
0 comments
Article is closed for comments.